top of page
RON FREITAS
District Attorney San Joaquin County
Embracing Survivors, Inspiring Hope
ESCAPE THIS SITE
400 East Main Street 7th Floor, Stockton, CA 95202
(209) 468-2600
HOME
OUR PARTNERS
ASALT
RESOURCES
DOMESTIC VIOLENCE RESOURCES
Domestic Violence & Firearms
HUMAN TRAFFICKING AWARENESS
SEXUAL ASSAULT AWARENESS
CLASSES & EVENTS
SELF CARE
ABOUT
MEET THE TEAM
More
Use tab to navigate through the menu items.
Calming Crafts
Calming Crafts
Play Video
Play Video
01:00
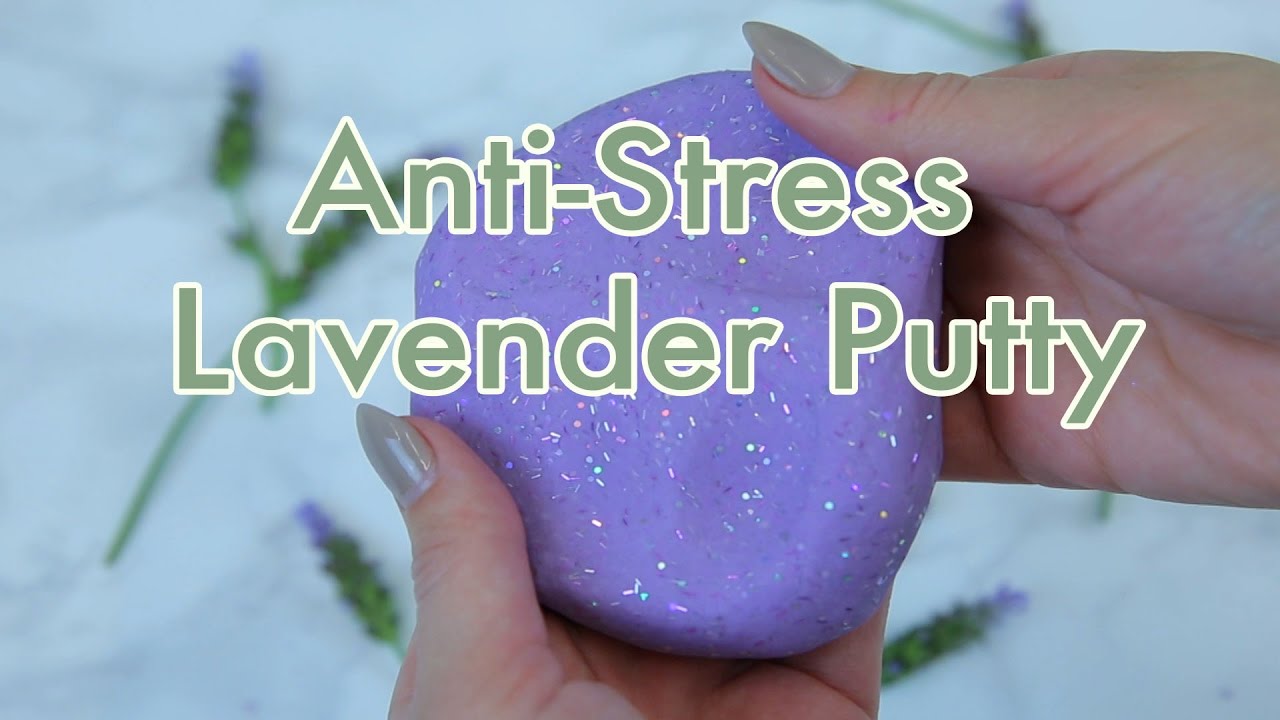
Anti Stress Lavender Putty | HG Craft | HelloGiggles
Your senses will thank you! Find the instructions HERE: http://hellogiggles.com/anti-stress-lavender-putty/
Play Video
Play Video
06:28
How to Finger Knit a Blanket [Washer & Dryer Safe]
Get the Written Pattern PDF here → https://payhip.com/b/3a4P1 Watch this video for tips before you make your blanket: https://youtu.be/XdxBT94Bhq8 In this video, I share how to finger knit a chenille chunky blanket. No experience with crochet/knitting necessary! The throw featured in this video is 3 ft x 4 ft - 36×48 inches (91.44×121.92 cm) 5 skeins Starting chain approx. 20-25 chains depending on tension 4 ft x 5 ft - 48×60 inches (121.92×152.4 cm) 6 skeins Bernat Blanket Yarn (32 yards/29 meters in each skein) Starting chain approx. 30 -35 chains depending on tension I would highly recommend that you use a tape measure and then chain to desired width measurement. Supplies: Bernat Blanket Yarn - Chalk Pink https://www.tkqlhce.com/click-100216280-13492653?url=https%3A%2F%2Fwww.michaels.com%2Fbernat-blanket-big-yarn%2FM10519837.html%3Fr%3Dg&cjsku=M10519837 If you want to make with traditional knitting 25 mm needles are recommended for this yarn weight. I like these: Knitter's Pride 25mm https://amzn.to/3ORXk5M TIME STAMPS: 00:00 Intro 00:25 Measurements 00:42 Beginning chain 01:22 Row 1 Making loops 02:22 Row 2 and so on 03:11 Tip: Avoid wwisting 03:22 Tip: Roll as you go 03:42 Attaching skeins (magic knot alternative) 04:42 Finishing blanket loops 05:56 Tip: Needle and thread optional 06:17 Outro
Play Video
Play Video
01:55
DIY | Best Stress Ball Ever!!
This is one DIY you MUST try...I literally have not put mine down since I made it!! Don’t forget to subscribe for new vids every M-W-F http://bit.ly/sub2moms SUPPLIES • Latex balloon http://amzn.to/2aME5vG • 1 TBSP corn starch • Water STEPS 1. Take balloon and attach to a funnel to give it a wider spout. 2. Add just a little bit of water to give the balloon some weight. 3. Add 1 TBSP of corn starch, and then massage the ingredients together. 4. Continue adding water and cornstarch the same way until the balloon is full. 5. Once balloon is full, pinch at top and tie a knot. Thank you for making us the #1 Parenting Channel on YouTube! Follow What’s Up Moms on: Facebook: https://www.facebook.com/WhatsUpMoms Instagram! http://instagram.com/whatsupmoms Twitter: http://www.twitter.com/whatsupmoms Pinterest: http://www.pinterest.com/whatsupmoms Follow Brooke on Instagram: http://instagram.com/bmahan519 Follow Brooke on Pinterest: http://www.pinterest.com/bmahan519/ We provide our videos for entertainment and promotional purposes only. It is your responsibility to evaluate the accuracy, timeliness, completeness, or usefulness of the content, instructions and advice contained in our videos. WUM is not liable for any loss or damage caused by your reliance on anything contained in our videos.
Play Video
Play Video
10:23
DIY Macrame Tutorial: 3 Feather Wall Hanging!
DIY Macrame Tutorial: 3 Feather Wall Hanging Tutorial! Please see below for materials and written instructions. Shop my book, Mixed Fiber Macrame, and Fiber Art Supplies (string, rope roving, ribbons, velvet and more) on my website or in my Etsy Shop: Website: https://www.lotsofknots.ca Etsy Shop: https://www.etsy.com/ca/shop/LotsofKnotsCanada Support me directly: https://ko-fi.com/lotsofknotscanada Materials: - 3mm Single Strand Twisted Cotton String - Driftwood - 10 inches long - Pet Brush - I’m using Wahl brand purchased from Walmart - Scissors - I’m using Loops & Threads scissors purchased from Michael’s Hey guys! I’ve got a super fun 3 feather wall hanging tutorial for you today. Let’s get started! Cut 3 pieces of rope, each piece is 35 inches long. Fold each piece in half and attach each to your piece of driftwood using a Lark’s Head knot. Feather 1 (left side) Cut 30 pieces of rope, each piece is 8 inches long. Fold the first piece in half and attach it to the left two strands of rope using a Cow Hitch knot so that the rope is hanging off the left side. Cow Hitch Knot Tutorial: https://youtu.be/wYaHv70qcKY Attach the second piece so that the rope is hanging off the right hand side. Continue to attach the rest of the pieces, alternating as you go. Feather 2 (centre) Cut 34 pieces of rope, each piece is 8 inches long. Attach each piece to the two strands in the middle of your work using the same process as the first feather. Feather 3 (right side) Repeat the exact same process you used for Feather 1 (cut 30 pieces of rope, each piece is 8 inches long). Brush out each feather. If it is easier you can take the feathers off of your piece of driftwood to brush them out and cut them and then add them back to the driftwood. You will scratch the surface underneath the feathers when brushing them out so I recommend using a surface that you don’t mind scratching up a bit. Tip: To make sure that the feather hangs straight I will push my Cow Hitch Knots close together to give the hanging a little more structure. Tie an overhand knot at the bottom of each of your 3 feathers using the two middle strands. Repeat this process with the other two feathers. Cut each feather to shape. Using a comb is not necessary but I find it helps to alternate between cutting and brushing so that I do not missing cutting any strands. The final size of my feathers are roughly 4 inches wide (2 inches of rope on each side) and 10 inches long for the left and right feathers, 11 inches long for the centre feather. Repeat the same process with the other two feathers. I did not add felt to the back or adhesive spray as I found these feathers to be small enough that they hold their shape on their own. To hang this wall hanging I added a piece of rope to the top and tied it on both sides with a constrictor knot. Constrictor Knot Tutorial: https://youtu.be/ibtsJBduiuQ Thanks so much for watching! I love to see you work so please feel free to tag me on Instagram or Facebook if you’ve used one of my tutorials. If you like this video please hit the thumbs up below and if you think this tutorial might be useful for others please feel free to share it. If you have any feedback please feel free to leave a comment. Music: Sunny Island (VLOG) by Scandinavianz https://soundcloud.com/scandinavianz Creative Commons — Attribution 3.0 Unported — CC BY 3.0 Free Download / Stream: https://bit.ly/sunny-island Music promoted by Audio Library https://youtu.be/DnxpC0ieRoc
Play Video
Play Video
10:02
DIY Macrame Tutorial - Lotus Flower
DIY Macrame Tutorial - Lotus Flower! Please see below for materials and written instructions. Shop my book, Mixed Fiber Macrame, and Fiber Art Supplies (string, rope roving, ribbons, velvet and more) on my website or in my Etsy Shop: Website: https://www.lotsofknots.ca Etsy Shop: https://www.etsy.com/ca/shop/LotsofKnotsCanada Support me directly: https://ko-fi.com/lotsofknotscanada Material: - 3mm Single Strand Twisted Cotton String Hey guys! Welcome back to my channel. Today I am going to show you how to create a Lotus Flower using double half hitch knots. For a slower, more in-depth tutorial on the 3 Must-Know Macrame Knots (including the double half hitch knot) please click here: https://www.youtube.com/watch?v=HPMe3nggRIk&t=953s Set-up: Cut 8 pieces of cord. For this tutorial I used 3 meters of string but please note that I had quite a bit of string leftover afterwards. Cut your cord depending on how much cord you would like left hanging below your flower afterwards. Fold each piece in half and attach to your dowel using Lark's Head knots. Using the 2 centre cords, tie a double half hitch knot. Using the 2 centre cords as your filler cords tie 3 more diagonal double half hitch knots on both sides of your work. Using the cord second from the left as your filler cord, tie 2 diagonal double half hitch knots working down and to the right. Using the cord second from the right as your filler cord, tie 2 diagonal double half hitch knots working down and to the left. This is a bit of a tricky part - using the cord on the left, tie just one half hitch to the cord on the right. Using the same filler cord tie 3 more diagonal double half hitch knots working down and to the right. Repeat that process on the right side of your work. Tie the 2 filler cords together at the bottom using a double half hitch knot. Using the cord second from the left as your filler cord tie 6 double half hitch knots. When you tie your first 3 knots, leave a little bit of space in between your last row and this row as we are create the top of a petal. Using the cord 4th from the left as your filler cord, tie 2 diagonal double half hitch knots working up and to the left. Change your filler cord - you will now use the cord on the left as your filler cord and tie 6 double half hitch knots working down and to the right. When you tie your first 3 knots, leave a little bit of space in between your last row and this row as we are create the top of another petal. Repeat that same process on the other side of your work. Tie one more diagonal double half hitch knot on both sides of your work then tie a final double half hitch knot with the 2 filler cords to connect the 2 sides. Thanks so much for watching! I love to see your work so please feel free to tag me on Instagram or Facebook if you’ve used one of my tutorials. If you like this video please hit the thumbs up below and if you have any feedback please feel free to leave a comment. Don’t forget to subscribe for weekly video tutorials!
Play Video
Play Video
01:41
DIY Sensory Bottles
Calm down jars, sensory bottles, whatever you want to call them, they're easy to make at home and great to have around for soothing yourself or your kids!
Play Video
Play Video
03:34
Paint Pouring on Rocks Made Easy (Beginner-Friendly)
Get great Beginner Tips, Supply List, and an easy to follow tutorial for paint pouring on rocks. For more information on the materials needed and easy step-by-step guide for paint pouring on rocks, check out https://www.rockpaintingguide.com/paint-pouring-on-rocks/ Here's a little peek at what you'll learn! Here are my Top 5 Beginner Tips for Paint Pouring on Rocks 1. Before starting to prep paint with a flow medium, go ahead and get all your supplies out and ready. 2. Have a clean workspace where you can prep, create, and leave the rocks to dry without moving them. Transferring the rocks to another location can cause the more rounded rocks to roll around and ruin your rock art. 3. When prepping your area, cover your table with plastic sheeting or cutting up a garbage bag with work too. 4. Keeping an art journal with the weight measurements of each color with flow medium will help you keep track of what you use, in case you love the color combination. Using a basic kitchen food scale will make this process simple. 5. Have kids? I have a very active 3-year-old boy and finding time to do this was a challenge. Little hands like to touch everything, so I choose a block of time when I was kid-free to try this for the first time. It made my experience less stressful and more fun for me since I could just focus on my first paint pouring project. If you like what you see, hit the thumbs-up and subscribe for more rock painting tutorials. Join our Facebook Group for more great rock painting ideas and post your rock art! www.facebook.com/groups/rockpaintingguide Facebook: https://www.facebook.com/groups/rockpaintingguide Instagram: https://www.instagram.com/rockpaintingguide Pinterest: https://www.pinterest.com/rockpaintingguide Italian Afternoon by Twin Musicom is licensed under a Creative Commons Attribution license (https://creativecommons.org/licenses/by/4.0/) Artist: http://www.twinmusicom.org/
Play Video
Play Video
05:45
How to Make Slime and Calming Glitter Jars
Feeling stressed out? Learn how to make slime with these glitter jars and to calm you down! Check out all of Marianne's HGTV videos here: https://www.youtube.com/playlist?list=PLPBX4CwI7bw-mwgfxZicGxoRneHz846ci Follow us on Twitter for even more crafty goodness: http://twitter.com/hgtvhandmade Be sure to subscribe to HGTV Handmade for more great DIY and crafting ideas: http://www.youtube.com/subscription_center?add_user=hgtvhandmade For more HGTV around the web, check out: HGTV YouTube Channel: http://www.youtube.com/hgtv HGTV on Twitter: http://www.twitter.com/hgtv HGTV on Facebook: http://www.facebook.com/HGTV
Load More
bottom of page


![How to Finger Knit a Blanket [Washer & Dryer Safe]](https://i.ytimg.com/vi/Gr-a15uJaoY/maxresdefault.jpg)